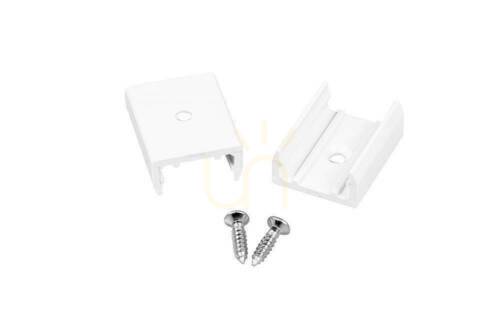
Neon flex mounting clips and brackets hold a run of flexible LED neon in place on a wall, ceiling, shelf edge or sign board. They keep the line straight, stop the silicone body sagging between fixing points and let you form curves and lettering that stay put for years.
What mounting hardware does
Neon flex looks rigid once it is lit, but on its own it droops, twists and creeps out of shape. Mounting hardware gives it a fixed path. The parts you will meet here fall into a few groups:
-
Individual brackets – small aluminium pieces with a fixing hole in the base and raised sides that form a short channel. The neon presses in from above. They usually come in pairs with screws, in white or silver to blend with the surface.
-
Installation kits – a set of brackets and screws matched to one neon profile, so you are not hunting for the right size separately.
-
Surface-mount stand-offs – cylindrical metal parts with a threaded connection that hold a modular neon system a little away from the wall, which gives a floating look and room for the cable behind.
Choosing the right clip or bracket
The one thing that decides compatibility is the cross-section of your neon. A bracket is shaped for a specific width and height, so a 4 × 10 mm neon needs a different bracket from a 6 × 12 mm or 7 × 15 mm one, even when they look alike in photos. Start with the designation printed on the neon’s product page, then pick the bracket made for it.
| What to check |
Typical options |
Why it matters |
| Neon cross-section |
4 × 10 mm, 6 × 12 mm, 7 × 15 mm and larger |
the neon must sit snugly without being squeezed |
| Light direction |
top-bend or side-bend neon |
the bracket orientation follows the way the neon emits light |
| Fixing method |
screws, or adhesive pads on smooth surfaces |
screws hold better outdoors and on long runs |
| Finish |
white or silver aluminium |
a matching colour almost disappears once the neon is lit |
| Spacing |
set by the neon profile and the route |
decides how many brackets you need for the whole run |
Fitting neon flex neatly
Plan the route first and mark where the power feed enters, so the connector end sits close to the driver. Clean and dry the surface. Fix the first bracket at the powered end, press the neon in gently with the flat of your hand rather than your fingertips, and work along the run towards the far end so the neon does not bunch up in the middle. Add extra brackets on curves, next to the end cap and anywhere the neon is exposed to wind.
Curves should be gradual. Spread a bend over several centimetres instead of forcing a tight kink, and never twist the neon along its length, because that strains the LED strip inside. For sharp outlines such as letters, an aluminium channel profile gives more control than separate brackets.
Outdoors and long-term care
Aluminium brackets do not rust, which makes them a sensible choice for façades, pergolas and balcony edges. Use screws suited to the wall (plugs in masonry, stainless screws outside) and keep the cable clipped so it never hangs from the neon. Once a year, check that no bracket has loosened and that the neon still sits fully in its channels; a slipped section tends to sag further with every hot day.
FAQ
How far apart should neon flex clips be?
Installers usually work with one bracket every 15–30 cm on straight runs, closer on curves and outdoors. The neon’s instructions may give a figure for that particular profile, and that figure wins.
Will any bracket fit my neon flex?
No. Brackets are made for a specific cross-section and light direction. Check the designation of your neon and choose the bracket listed for it; a similar shape is not enough.
Can I mount neon flex outside?
Yes, if the neon itself is rated for outdoor use, typically IP65 or higher, and the connections are sealed. Fix it with screws rather than adhesive, because sun and frost weaken sticky pads.
How do I take neon flex round a corner?
Bend it gradually, keep within the minimum bend radius stated for your neon and place a bracket just before and after the bend so the curve holds its shape.
Start with the right length of neon flex, and if you need a continuous channel instead of separate brackets, look at neon flex profiles.