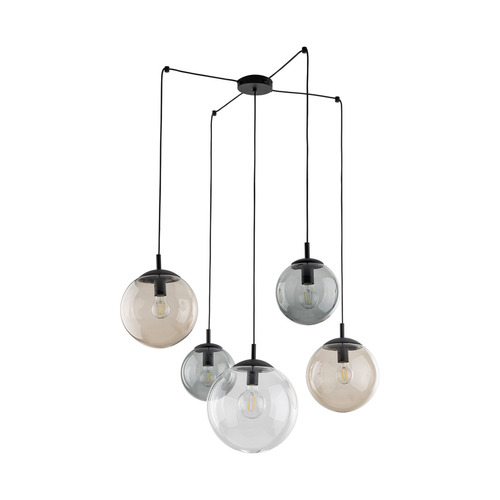
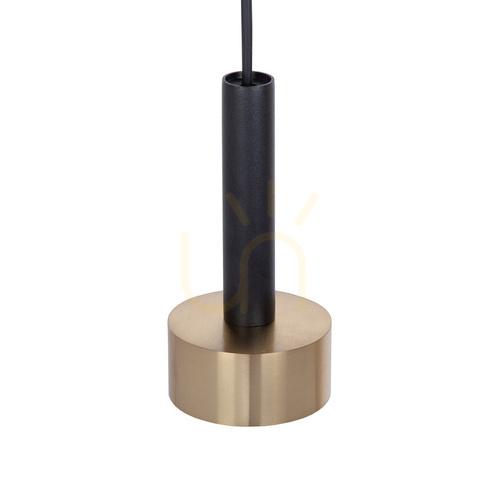
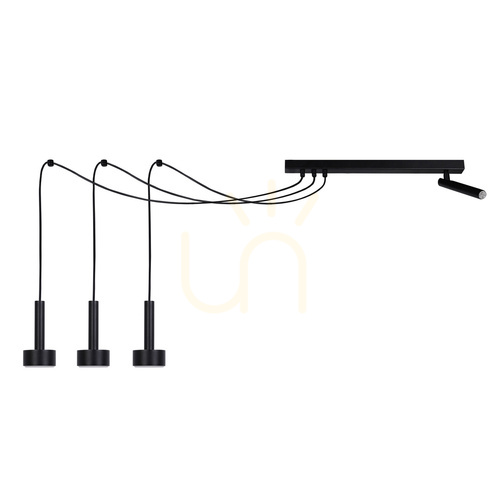
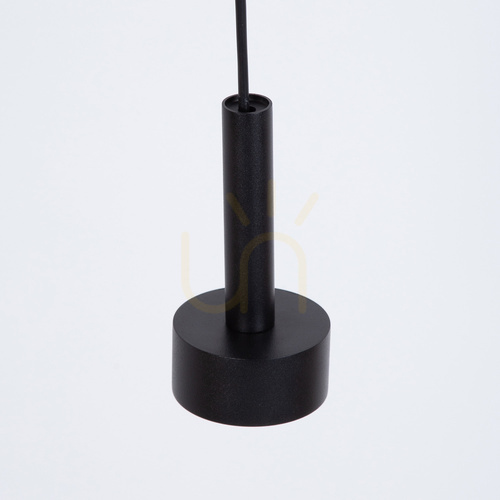
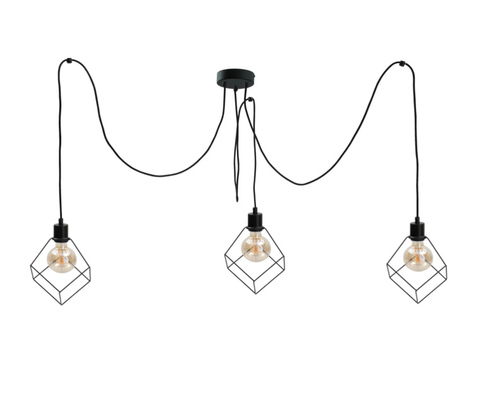
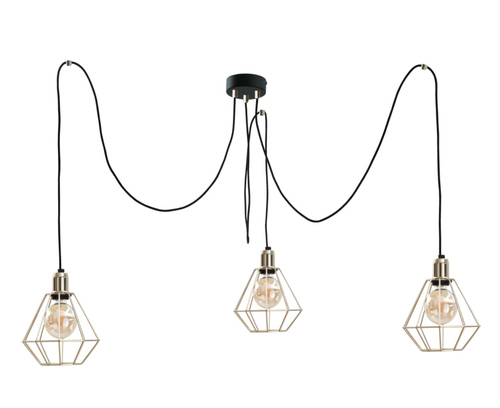
Spider ceiling lights run several cable pendants out from one central canopy to separate hooks across the ceiling, and each cable then drops down to a bulb or a shade. That's how one ceiling point can light a long dining table, a sofa corner and a reading spot at once. The cables themselves draw the spider outline, so you shape the light by where you place the hooks.
The trick is to plan the layout around your room, not around the product photo. Count the drops you need, measure each cable route and pick shades for the people sitting under them. The sections below give you the numbers to do it on paper first.
A cable spider is different from a rigid-arm fitting
In a cable spider, every drop is a length of flexible flex that leaves the canopy, runs across the ceiling to its own hook and hangs down from there. You decide how far each arm reaches and where it lands. Rigid radial chandeliers, sometimes sold under a "spider" name, have fixed metal arms instead; they're lovely, but the layout is set at the factory. On the product sheet, look for the number of drops, the cable length per drop and the hooks or ceiling eyelets included.
Typical spider pendants come with three to ten drops. Three or five suit a round table or a compact living area. Six to ten spread nicely over a long dining table, a kitchen with an island or an open-plan room where you want light in several zones.
The look ranges far beyond industrial lofts. Bare filament bulbs with a fabric braided flex give the classic warehouse feel. Glass globes in smoke, amber or opal look softer and suit Scandinavian and mid-century rooms. Small metal or rattan shades turn the same idea into something warmer. Pick the canopy and cable colour to match the ceiling or to stand out on purpose: black flex on a white ceiling draws strong lines, white flex almost disappears.
Plan the lights around furniture and movement
Sketch the room from above. Draw the table, the sofa, the main walking routes and the canopy position. Then mark where each light should hang. Spiders are made for ceilings where the supply point isn't where you need the light: a canopy in the middle of the room can easily feed drops over a table near the window.
Over a long table, line the drops up along the centre in one or two rows, spaced roughly 40–60 cm apart, and keep the outer ones about 30 cm in from the table ends. Over a round table, gather them in a loose cluster at slightly different heights. Leave at least 10 cm between neighbouring shades so they don't touch when someone brushes against them.
In a living area, think about sightlines. Keep drops away from the line between the sofa and the TV, and hang them over furniture rather than over open floor where people walk. Look at your sketch from the doorway too. Even switched off, the cable pattern is part of the ceiling, and a tidy, deliberate pattern looks better than an even spread for its own sake.
Cable length has to cover the whole route
Each cable has to travel from the canopy to its hook and then down to the light. Spider pendants are often supplied with roughly 1.5–3 m of cable per drop, and that length covers both parts. Add them up for every arm before you drill.
Here's a quick example. A hook 1 m from the canopy plus a 70 cm drop needs 1.7 m. Add about 10–15% if you'd like a gentle swag between canopy and hook rather than a taut line, which brings you to roughly 1.9–2 m. Do this for each arm and you'll see straight away which hooks are within reach.
Most spiders let you set the drop by sliding the cable through a cord grip at the hook or the canopy, so you can fine-tune heights once everything is up. Spare cable usually coils in the canopy or loops neatly over the hook. If you need a longer reach than the fitting offers, choose a model with longer cables from the start; a fitting designed for that length keeps its strain relief and support working as intended.
| Planning element |
What to check |
Typical guidance |
| Number of drops |
Size of the area you want to light |
3–5 for a round table, 6–10 for long tables or open plan |
| Cable route |
Run across the ceiling plus vertical drop |
Add 10–15% for a soft swag |
| Hook spacing |
Distance between drops over the table |
About 40–60 cm apart |
| Hanging height |
Bottom of the shade to the tabletop |
About 70–80 cm over a dining table |
| Bulb choice |
Holder type, maximum wattage and size |
Often E27, warm white 2200–2700 K |
Set the hanging height for the area below
Over a dining table, let the bottom of each shade or bulb hang about 70–80 cm above the tabletop. That keeps light out of seated eyes and lets people talk across the table. A staggered layout, where some drops hang 10–20 cm higher than others, looks lively and still keeps the lowest one in that range.
Anywhere people walk underneath, keep the lowest point at least 2.1 m above the floor. That usually means short drops close to the ceiling near doors and long drops only over furniture. Check doors and tall cupboard fronts as you plan; an open door can swing into a low shade.
Low ceilings work well with spiders if you keep the drops short and gather them over a table or sideboard. Under a 2.4 m ceiling, a 50–60 cm drop often puts the bulbs at a comfortable height above a table while leaving clear headroom elsewhere. Check the minimum overall height on the product sheet, since that tells you how short the drops can go.
Bare bulbs, glass and wire shades
With bare bulbs, the bulb is the design, so pick it with care. Large decorative globes (G95 or G125) give a bold dot at the end of each cable, while smaller teardrop or ST64 shapes look more delicate. Filament LED bulbs with 2200–2700 K give that warm, amber glow people love in spider lights.
To keep things comfortable when you look up from the sofa, use lower-output decorative bulbs of about 200–400 lm each, or a frosted or opal finish. Crown-silvered bulbs, with a mirrored top, throw light up to the ceiling and hide the bright filament from below. Check reflections in a TV screen or a mirror once everything hangs.
Clear glass shades add sparkle and show the bulb. Opal or frosted glass spreads the light more softly and works well over a dining table. Wire cages mostly add an outline, so pair them with a frosted or low-output bulb. Glass globes weigh more than bare bulbs, so check that the hooks and cable grips are rated for the shade you choose.
More drops, more light? Plan the output per drop
Brightness comes from the total lumens, not from the number of cables. Six decorative bulbs at 250 lm each give around 1500 lm, which is enough for atmosphere and a cosy dinner. For a well-lit table or a room where the spider is the only ceiling light, plan roughly 2000–3000 lm in total, or add a floor lamp or wall lights for reading and tasks.
Most spider pendants use standard E27 holders, which makes bulb choice easy. Check the maximum wattage per holder and the bulb size that fits the shade. Compare bulbs by lumens rather than watts: a 4–7 W LED bulb typically gives 400–800 lm, depending on its type.
For dining and living areas, warm white around 2700–3000 K is the usual starting point; filament bulbs at 2200 K feel even cosier. Neutral white around 4000 K suits kitchens and workspaces. Use the same colour temperature in every holder, so all the drops glow alike. If food, textiles or pictures matter to you, choose bulbs with CRI 90 or more.
Dimming and switching need a compatible arrangement
Dimming makes a spider light far more versatile, from bright dinner prep to a soft evening glow. Use dimmable LED bulbs in every holder and a trailing-edge LED dimmer whose minimum load fits the total wattage. Low-wattage bulbs add up to a small load, so a dimmer with a low minimum load gives smooth, flicker-free dimming.
Smart bulbs are an easy alternative. In standard E27 holders, Wi-Fi, Zigbee or Bluetooth bulbs let you dim, group and schedule the drops from an app, with no rewiring. That's also the simplest way to light only some drops at a time.
A few spiders are wired on two circuits, so you can switch groups of drops from separate switches. The product sheet lists it as separate or group switching, and your electrician can confirm whether your ceiling has the second switched feed it needs.
Ceiling supports are part of the selection
Each hook or eyelet holds one cable with its bulb or shade, and the canopy carries its own weight plus the cable tension. Into solid concrete or a timber joist, the supplied fixings usually do the job. On plasterboard, use cavity anchors rated for the load or find a joist for each hook. Mark all hook positions on the ceiling with a pencil and step back to check the pattern before drilling.
The connection at the ceiling rose is a job for a qualified electrician, with the power isolated at the consumer unit. Run the cables along the route the instructions show and let each drop hang freely from its cord grip, without extra knots or joins in the flex.
For bathrooms, covered terraces and other damp spots, choose a fitting with the IP rating for that place; in UK bathrooms, zone 2 needs at least IPX4. Braided flex and open bulb holders are designed for dry indoor rooms.
Questions about spider ceiling lights
How far can the drops spread from the canopy?
As far as each cable allows once you subtract the drop. With 2 m of cable and a 70 cm drop, a hook can sit up to about 1.2 m from the canopy, a little less if you want a soft swag. Sketch each route before you drill.
Can the cables be shortened?
Most spiders let you adjust the drop through a cord grip and store spare cable in the canopy or over the hook. That's usually all you need to fine-tune heights. For a much shorter or longer layout, pick a model sized for it.
Can a spider fitting work with a low ceiling?
Yes. Keep the drops short, about 50–60 cm under a 2.4 m ceiling, and gather them over a table or sideboard. Leave at least 2.1 m of headroom wherever people walk.
How many drops do I need over a dining table?
As a guide, one drop per 40–60 cm of table length. A 180 cm table looks balanced with three to five drops in a row, or six in a staggered double row.
Does a larger number of bulbs make the room brighter?
Only the total lumens do. Six decorative bulbs at 250 lm give about 1500 lm, which suits atmosphere. For a main light, plan 2000–3000 lm in total or add a lamp for reading.
Can the drops be switched in groups?
Some fittings are wired on two circuits for that. With standard E27 holders, smart bulbs are the simplest route: group and dim them from an app without new wiring.
How can I reduce glare from exposed bulbs?
Use warm filament bulbs of 200–400 lm, frosted or opal glass, or crown-silvered bulbs that hide the filament. Dim the light for evenings, and hang the bulbs above seated eye level.
How should the fitting be cleaned?
Switch off at the wall and let the bulbs cool. Dust the flex with a dry cloth and wipe glass shades with a damp microfibre cloth, holding each shade steady so the cable stays still. Keep liquid away from the holders.
What should I compare before deciding?
Number of drops, cable length per drop, hanging height, ceiling fixings and total light output. If one ceiling point and a single drop will do, compare our other pendant lights as well.