
LED lights flickering: causes and fixes
LED lights flickering usually means a mismatched dimmer, 12 V transformer or power supply; a glow after switch-off means a trickle of current still flows. These are two separate problems with different causes. For each cause we give the symptom, a safe check that needs no tools and what to replace. We also show which markings on the bulb and dimmer decide compatibility, and where your own checks end and the electrician’s work begins.

Contents
- Why do my LED lights flicker?
- Where does LED flicker come from?
- Visible flicker vs the stroboscopic effect
- LED lights flickering while switched on – causes
- Why do LED lights flicker when dimmed?
- Dimmable LED bulb – how to read the product page
- A 12 V transformer left over from halogens
- LED strip: undersized power supply and voltage drop
- Cheap bulb, worn driver, overheating
- Loose contact and a worn lampholder
- Voltage fluctuations – when every light flickers
- Why is my LED bulb glowing when off?
- Does flickering LED light harm your eyes?
- What you can check yourself and what is a job for an electrician
- Frequently asked questions
- Where to start
Why do my LED lights flicker?
Mostly because something does not match: the dimmer does not suit LEDs, the 12 V transformer needs a higher load, or the strip’s supply is too weak. Less often it is a cheap driver, overheating, a loose contact or voltage dips. If the light glows or blinks after switch-off, a trickle of current still reaches it.
Safety first. If you smell burning, hear crackling, or see sparks or a melted or discoloured lampholder, run no tests. The same applies if some lights dim sharply while others brighten, or a breaker keeps tripping. Switch the circuit off if you can do so safely and call an electrician.
Otherwise, match the symptom to the most likely cause:
- The light pulses or buzzes only when dimmed, worst at low settings → a dimmer that does not suit LEDs or a non-dimmable bulb.
- 12 V downlights flicker or stay dark after swapping halogens for LEDs → the 12 V transformer.
- An LED strip blinks off and on every 1–2 s, or its far end is dimmer → the power supply and voltage drop.
- One bulb of several in a fitting flickers → the bulb itself or its lampholder (cheap bulb, loose contact).
- The bulb blinks or goes out only after 10–20 minutes, usually in a closed shade → overheating.
- Lights in several rooms dip briefly when the washing machine, fridge or pump starts → voltage fluctuations.
- After switch-off there is a faint glow or a flash every few seconds → current from a switch or sensor, induced voltage or a switch in the neutral conductor.
- After switch-off the bulb fades out over a second or two → normal: a capacitor in the driver releases its energy.
- The eye sees nothing, but dark bands roll across the phone screen → the light is modulated; see flicker and the stroboscopic effect.
The first test needs no tools. Switch off that circuit’s breaker or unplug the lamp, let the bulb cool, and swap it with a same-base bulb from another working lamp without a dimmer. If the problem moves with the bulb, suspect the bulb – you will find a replacement among our LED light bulbs. If it stays, look at the lamp, dimmer, switch or wiring. The light switch alone is not enough, as you do not yet know whether it breaks the right conductor – see the section on a switch in the neutral conductor.
Where does LED flicker come from?
From the mains itself: on a 50 Hz supply the voltage drops to zero a hundred times a second, and an LED shines exactly as the current flows through it. Whether its light is steady depends on the driver built into the bulb, usually in its base.
An incandescent bulb reacted to those dips too, but its hot filament had no time to cool, so its light was far steadier. A good driver smooths the current, while a cheap one skimps on capacitors and the light pulses 100 times a second. Every device between the mains and the bulb – dimmer, transformer, strip power supply, smart switch – can upset it. So rather than buying another bulb to see if it helps, find the link in the chain that does not match.
Visible flicker vs the stroboscopic effect
“LED lights flickering” covers two different phenomena:
- Visible flicker – the light clearly blinks or wavers even when you look at a still room. It concerns slower changes in brightness, conventionally below about 80 Hz – typically with an unsuitable dimmer, an overloaded power supply or a loose contact. Its severity is described by the Pst LM metric: a value of 1 is the threshold at which an average observer has a 50% chance of noticing the flicker.
- The stroboscopic effect – faster modulation, for example at 100 Hz, is usually invisible when you look straight at the lamp but shows up with movement. Fan blades seem to slow down, and a waving hand leaves a series of “ghosts” instead of a smooth blur. Its visibility is described by the SVM metric: 1 is the visibility threshold for an average observer.
The EU ecodesign regulation for light sources, (EU) 2019/2020, has applied since 1 September 2021. For covered LED light sources running directly on 230 V mains it set the limits Pst LM ≤ 1.0 and SVM ≤ 0.9. Since 1 September 2024 the limit has been SVM ≤ 0.4, with exceptions for some outdoor and industrial applications, among others. The limits are measured at full power, so they say nothing about a dimmed bulb. They apply to mains-voltage light sources, so they do not cover strips or 12 V bulbs. Products placed on the market earlier may perform worse. The Pst LM and SVM values of a given bulb are listed on its product information sheet in the EU EPREL database – we give the registration number for many of our light sources.
Two home tests, no tools needed:
- The phone test: point the camera at a lit lamp or at a white wall it lights. Dark bands rolling across the picture show that the light is modulated – the phone’s sensor reads the image line by line and “catches” brightness changes the eye cannot see. That is not yet the stroboscopic effect a person perceives.
- The pencil test: under the lamp, wave a pencil quickly in front of a sheet of white paper. A smooth, blurred streak is a good sign; a row of separate, sharp images of the pencil is the stroboscopic effect itself.
Both tests compare bulbs under the same conditions but measure nothing: the phone result depends on exposure time, and no bands does not prove no modulation.
LED lights flickering while switched on – causes
The causes are listed in the order worth checking, each with symptom, safe check and fix. Any work on the 230 V installation – replacing a dimmer, a switch, a transformer or a lampholder – is a job for an electrician.
Why do LED lights flicker when dimmed?
Because the dimmer does not suit the LEDs: it runs in a mode meant for incandescent bulbs, the total LED wattage is below its minimum load, or the bulbs are not dimmable at all. If the light flickers only at the bottom of the range, the bulb’s driver is short of energy there.
Symptom: the light pulses, wavers or blinks, especially at the bottom of the range; the dimmer or bulb hums; the lamp goes out before the end of the range or only comes on after a big turn of the knob; the bulbs glow faintly after switch-off.
A typical 230 V wall dimmer is a phase-cut dimmer: it “chops off” part of each half of the sine wave, which lowers the effective (RMS) voltage. It does this in one of two ways:
- leading edge – the classic triac dimmer, intended mainly for resistive and inductive loads (marked R, L): incandescent bulbs, 230 V halogens, wire-wound transformers. Switching the current on abruptly in the middle of each half-wave is hard on many LED drivers;
- trailing edge – intended for resistive and capacitive loads (R, C), which includes electronic drivers, and therefore usually works better with LEDs.
Neither the mode nor a “universal” label guarantees compatibility, though – some bulb manufacturers explicitly recommend leading edge. The bulb’s instructions and the compatibility list decide.
Then there are three numbers:
- Minimum load. The dimmer’s electronics need a certain current to work stably. Older models made for incandescent bulbs have a threshold of typically 20–40 W, and three 5 W LED bulbs add up to 15 W – not enough. LED dimmers usually have a much lower threshold; what counts is the exact figure given for LEDs.
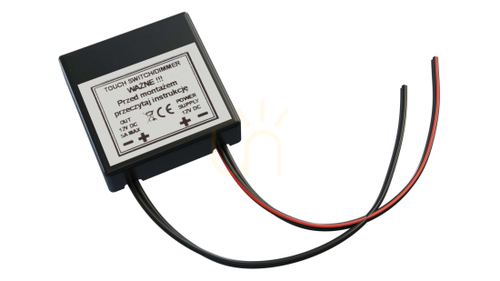
- Maximum LED load. It is much lower than for incandescent bulbs, because LED drivers draw a brief, high current to charge their capacitors at switch-on. An example from a product page: a touch dimmer module rated 25–150 W for halogens and 3–25 W for LEDs.
- Minimum dimming level. Many LED bulbs do not shine stably at very low settings. Some dimmers have a minimum-level adjustment, and raising it removes the flicker at the bottom of the range. You can set a front knob or mode yourself; internal trims are for an electrician.
A non-dimmable bulb on a phase-cut dimmer flickers even with the knob turned to maximum. The dimmer usually still chops off part of the sine wave, and the driver of such a bulb is not designed for that. The result is flicker, humming and early failure. On a dimmed circuit fit only bulbs marked as dimmable – or replace the dimmer with an ordinary switch.
How to check:
- Find the dimmer’s instructions or the installation documents: the operating mode (R, L / R, C / “LED”) and the power range for LEDs. If you have none, an electrician can read the model. It is usually on the mechanism behind the faceplate, next to live terminals, so do not remove the faceplate yourself.
- Add up the wattage of the LED bulbs on that circuit and compare it with the dimmer’s LED range.
- Check that every bulb is marked as dimmable and that they are all the same model. Different LEDs, let alone LEDs mixed with a halogen, on one dimmer are a typical source of trouble.
- If the light is steady at full brightness and flickers only at the bottom of the range, the cause is most likely the dimmer or its minimum setting.
What to do:
- Have an electrician replace the dimmer with an LED-rated model that is compatible with your bulbs (ideally from a compatibility list) and whose minimum load is below their combined wattage. Models with an R, L / R, C mode switch and adjustable minimum and maximum brightness are convenient – the electrician sets them during installation.
- Replace the bulbs with dimmable ones, ideally one model from one series for the whole circuit.
- If the total LED wattage is too low for the dimmer and you cannot replace it, ask an electrician for a load-correction module. It must be one that the dimmer’s manufacturer approves for that use.
- For a fitting with integrated LEDs, check on the product page which dimming method the driver supports. A fitting controlled only by DALI, 1–10 V or a remote will not dim with an ordinary wall dimmer.
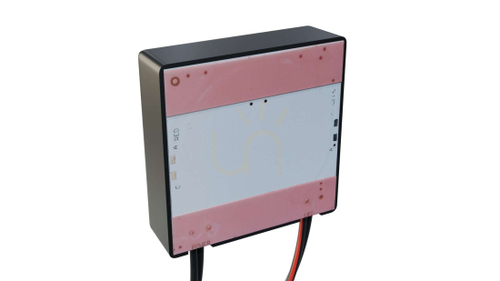
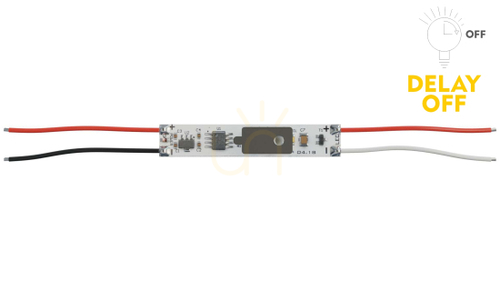
You will find LED dimmers – for 230 V bulbs and for strips – in our Dimmer switches category.


Dimmable LED bulb – how to read the product page
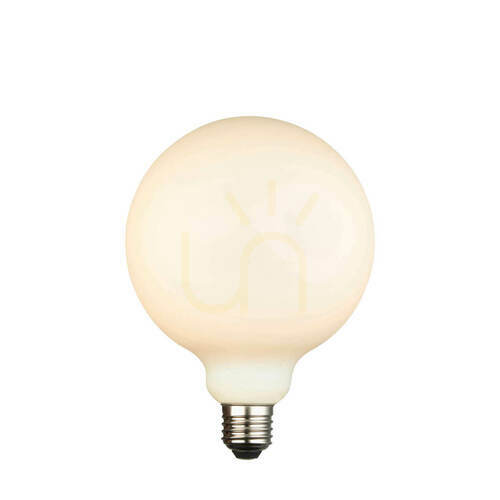
On a bulb with a cap, “dimmable” usually means its driver tolerates a phase-cut dimmer. It does not say which dimmer it will work with, and for fittings with integrated LEDs “dimmable” may mean a completely different control method. What to look for:
- A dimmer icon on the box means a dimmable bulb; the same icon crossed out means non-dimmable. Treat missing information as a “no”.
- The “Dimming” field on our product pages gives the method. For phase dimming it states the edge: leading edge or trailing edge; a bulb marked with both works with either type of dimmer. “TRIAC” means a driver designed for phase-cut dimmers; check the instructions for compatibility with a specific mode. “DALI” and “1–10 V” mean control over a separate pair of wires – an ordinary rotary dimmer cannot replace it unless the driver also supports phase dimming. “Switch DIM” (on our pages also “Dim Switch”) or “push-dim” means control with a momentary push button wired to the driver’s input. “Dimming with a standard switch” means brightness steps set by clicking an ordinary light switch. None of these is meant for a phase-cut dimmer unless the instructions say otherwise.
- “Yes, using a dimmable bulb” in the “Dimmable” field of a fitting that takes bulbs means the fitting itself does not get in the way of dimming. The result depends on the bulb and dimmer you choose.
- Some manufacturers state down to what percentage the bulb dims smoothly. Below that level, flicker is possible even in a well-matched set.
- Bulb manufacturers publish lists of dimmers tested with their bulbs, and dimmer manufacturers publish lists of bulbs. Look not only at the model but also at the number of bulbs stated: a pair from the list gives the most certainty in the stated configuration. If your pair is not listed, first buy a full set of bulbs for one dimmer and test it across the whole range. Only then replace the bulbs throughout the house. A test with a single bulb may turn out worse than the final set, because on its own it will not reach the dimmer’s minimum load.




A 12 V transformer left over from halogens
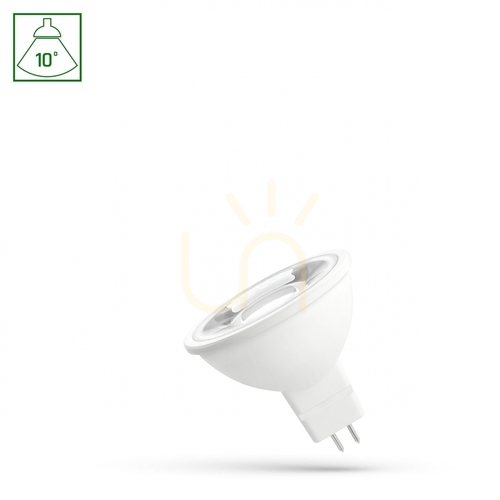
Symptom: after replacing MR16 halogens (GU5.3 base) with LEDs, the downlights flicker, pulse, start late or not at all; sometimes they work only when more are switched on together.
Why: an MR16 halogen ran on 12 V from a transformer. Electronic halogen transformers have a minimum load – the casing shows a range such as 35–105 W. Three 35 W halogens drew 105 W; three 4–5 W LEDs draw 12–15 W, well below the threshold. Such a transformer may fail to start at all, run unstably or keep switching on and off – hence the flicker. On top of that it outputs high-frequency voltage, which not every LED bulb driver can cope with. A heavy wire-wound (toroidal) transformer has no electronic start-up threshold, but its output voltage rises at light load, so the bulb’s data sheet still decides compatibility.
How to check: add up the LED wattage on one transformer and find its data in the installation or fitting documents. If it cannot be reached without taking a fitting out of the ceiling, leave that to an electrician.
What to do:
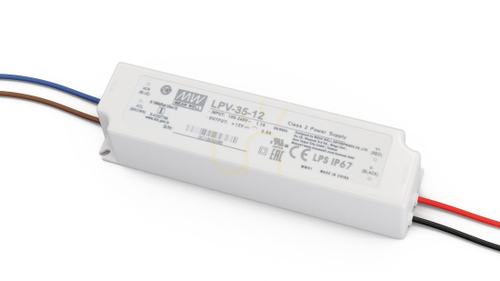
- Replace the halogen transformer with a 12 V constant-voltage LED power supply, sized to the total wattage of the bulbs with 20–25% headroom, or with an LED-rated transformer that has no minimum load. Check that the bulbs accept direct current – look for “12 V AC/DC” or “12 V DC”.
- Use one bulb model per power supply.
- If the 12 V circuit used to be dimmed, choose a dimmable power supply and a dimmer that is compatible with it.
- Consider switching to GU10 230 V, which needs no transformer at all. An electrician will judge whether replacing the lampholders is enough or whether a whole new fitting rated for 230 V is needed.
You will find bulbs for 12 V downlights among our MR16 bulbs, and power supplies among our 12V LED power supplies.




LED strip: undersized power supply and voltage drop
Symptom: the whole strip blinks off and on every 1–2 s, or lights for a few seconds and goes out; the far end of a long run is dimmer or a different shade; it flickers only when dimmed; bands show on phone video.
Why:
- A switch-mode power supply loaded beyond its rated output, or with a short circuit along the run, trips its protection. In many models this is “hiccup” mode: the supply cuts its output and keeps trying to restart, which you see as rhythmic blinking. Other models limit the current or shut down for good.
- At the same wattage a 12 V strip draws twice the current of a 24 V one. Over a long run and a thin cable the voltage falls and the far end dims.
- A 230 V wall dimmer in front of an ordinary, non-dimmable strip power supply is a recipe for flicker and risks damaging the supply.
- Controllers dim a strip with PWM, switching it on and off very fast. Cheap models do it slowly enough to show with movement and on video.
How to check: strip wattage = W/m × length, e.g. 9.6 W/m × 5 m = 48 W; compare it with the supply’s rating. Check that strip and supply voltages match (12 V or 24 V) and how long a run is fed from one end. If the strip has plug-in connectors, unplug part of it with the power off. If a shorter run is steady, the supply is probably too weak – though a damaged strip section or an overheated, worn supply can do the same.
What to do:
- Choose a constant-voltage power supply matching the strip, with the same headroom (for a 48 W strip – a 60 W supply).
- For longer runs, choose a 24 V strip instead of 12 V, feed it from both ends or at several points according to the strip manufacturer’s diagram, and use a thicker supply cable. Keep to the maximum length on the strip’s data sheet.
- Dim either with a PWM controller on the 12/24 V side (between the power supply and the strip) or with a phase-dimmable power supply that works with a wall dimmer. If bands on video bother you, choose a controller for which the manufacturer states a high PWM frequency.
- Leave connecting the power supply to the 230 V installation, and any changes to multi-point feeds, to an electrician.
You will find power supplies in our LED power supplies category, and dimmers and remotes for strips in our LED drivers category.


Cheap bulb, worn driver, overheating
Symptom: with no dimmer at all, the bulb flickers from day one – usually subtly, visible in the pencil test and on photos. Or it worked well, then after months started blinking, dimming, or going out and coming back on by itself after a while.
Why:
- A cheap driver in the bulb smooths the current poorly, so the light pulses 100 times a second (twice the mains frequency).
- The weakest link of an LED bulb is usually not the diode but the electrolytic capacitor in the driver. It ages faster the hotter it runs. A closed glass shade, a recessed fitting with no ventilation or a bulb mounted base-up are the conditions in which the electronics get hottest.
- Some bulbs have thermal protection that dims or switches off the light when it overheats and switches it back on once it cools. It looks like the bulb going out every few minutes or every quarter of an hour.
How to check: the bulb-swap test and the pencil test; on the bulb’s data sheet, check whether the manufacturer approves it for enclosed fittings.
What to do: replace the bulb with a model that declares low flicker (“flicker-free”, “no flicker” or low Pst LM and SVM in EPREL), and for enclosed fittings use a model approved for them. Use one series per fitting.
Loose contact and a worn lampholder
Symptom: LED lights flickering irregularly, sometimes going out and coming back – for example when someone slams a door or walks across the floor; outdoor lights flicker in the wind.
Why: the bulb is not screwed in fully; the centre contact in an E27 or E14 lampholder has been flattened by years of screwing bulbs in and no longer presses on the contact at the bottom of the bulb cap; the contact is oxidised; a wire has worked loose in a terminal of the fitting, the switch or a junction box. A loose connection produces tiny sparks that heat the contact, and that is a fire risk.
How to check: if any of the warning signs from the “Safety first” box have appeared – crackling, a smell, discolouration – do not check anything; switch the circuit off and call an electrician. If not, switch off the circuit breaker or unplug the lamp, wait for the bulb to cool and screw it in until it stops, without force. Do not move the lamp while it is live to “trigger” the symptom, do not poke tools into the lampholder and do not touch the contacts.
What to do: if tightening does not help and the problem affects one lampholder, have an electrician replace it. If the whole circuit flickers rather than one lamp, an electrician will check the terminals in switches and junction boxes.
Voltage fluctuations – when every light flickers
Symptom: lights in several rooms dip or blink briefly when a large appliance switches on – especially when a fridge, washing machine or pump motor starts; in the evening the light wavers slightly.
Why: switching on a large appliance causes a momentary voltage drop in the installation, and a starting motor also draws a brief, high current. A traditional bulb reacted gently, while an LED bulb with a simple driver shows every such dip; better drivers compensate for small fluctuations. The EN 50160 standard describes public supply voltage in 10-minute averages – in simplified terms 230 V ±10% (in the UK the statutory range is +10%/−6%). That does not mean that clear, recurring blinks are fine.
When it is a warning sign: the dimming is strong or getting worse; some lights dim while others brighten at the same moment; bulbs in part of the house fail noticeably more often. This can be the sign of a loose or damaged neutral conductor in the consumer unit or the supply connection. Such a fault can push the voltage at some sockets well above 230 V and damage equipment. Call an electrician straight away, and if your neighbours have the same problem, report it to your electricity network operator’s emergency line (105 in the UK).
What to do: if the blinks are clear and keep recurring, first have an electrician check the connections and how the circuits are loaded – they can also put large appliances and lighting on separate circuits. Better bulbs only help once the installation is sound.
Why is my LED bulb glowing when off?
Because a small current still reaches the lamp: from an illuminated switch, a smart switch or motion sensor without a neutral, or via coupling with a long cable. The capacitor in the bulb’s driver slowly charges and releases the energy as a faint glow or a flash every few seconds.
An ordinary switch, once off, cuts the lamp’s working current, but small currents can still flow – through a switch’s electronics or via coupling between cables. An incandescent bulb did not care: its filament needs hundreds of times more current to glow. An LED needs only a trickle. Less often, the glow gives away a switch wired into the neutral conductor, and that is a safety matter.
Illuminated switch, smart switch, motion sensor
Symptom: the glow or flashes appeared after fitting a switch with an illuminated rocker, a smart switch (Wi-Fi, Zigbee), a motion sensor, an electronic dimmer, a staircase timer or a time switch.
Why: in a typical illuminated switch, the indicator lights up because a small current flows through the switch when it is off – and that current carries on through your lamp. A smart switch or motion sensor in a no-neutral (so-called two-wire) version powers its own electronics in the same way, even when the light is off. Some electronic devices that do have a neutral also let a small leakage current through.
How to check: does the switch have an indicator light or electronics, and did the problem start after it was fitted? If an ordinary switch on the same circuit caused no glow, the cause is almost certain.
What to do:
- Replace an illuminated switch with one without an indicator, or disconnect the indicator if it is a separate module in that mechanism.
- Replace a smart switch or sensor with a model powered from the neutral conductor, or add a bypass module at the lamp recommended by the switch manufacturer. A neutral-powered model needs a neutral in the switch box, which older installations often lack.
- In each of these cases a load capacitor at the lamp can help.
Replacing the switch and fitting the module is a job for an electrician.
Induced voltage in long cables
Symptom: a faint, steady glow in a lamp controlled by an ordinary switch with no electronics. It most often affects outdoor lighting, a garage, a lamp at the end of a long circuit, stair lighting switched from two places (two-way switches) or cables run together with other circuits in one conduit.
Why: when the cable to a lamp runs for many metres parallel to a live conductor – in one cable or one conduit – the two act like a capacitor. A voltage then appears on the disconnected wire, commonly called induced voltage; physically it is capacitive coupling. There is very little current, but it is enough to make an LED bulb glow.
How to check: at home only indirectly: a switch with no electronics, a long cable run, a faint and steady glow. It has to be confirmed by an electrician, who will also tell it apart from a switch breaking the neutral conductor. The symptom can look similar, and a meter or tester reading on its own does not settle it.
What to do: an electrician usually fits a load capacitor or resistor at the lamp, or a relay close to the fitting; sometimes rerouting the cables is enough.
Switch in the neutral conductor – a safety issue
Symptom: the bulb glows faintly or flashes after switch-off, although the switch is an ordinary one – often in older installations or after amateur alterations. Very often, though, there is no visible symptom at all: the absence of a glow does not rule this fault out.
Why it matters: a switch should break the live (phase) conductor (L). If it was wired into the neutral (N), the lampholder and the wires in the fitting remain live after you switch the light off. A glow appears when the current finds a leakage path, for example through the fitting’s body to the protective earth conductor. So when you unscrew a bulb “with the light off”, you may touch live parts.
How to check: do not try it yourself with a tester in the lampholder. An electrician will check it with a meter in a few minutes.
What to do: until the electrician’s visit, change bulbs in that lamp only with the circuit breaker switched off. The electrician will correct the wiring so that the switch breaks the live conductor – sometimes that takes more than moving one wire in the switch.
Load capacitor (bypass) – when it helps
A small component – a capacitor or a resistor module – that an electrician connects in parallel with the lamp, in the junction box or fitting. It gives the leakage current an easier path than the bulb’s driver, so the bulb’s capacitor does not charge and the glow and flashes stop.
It helps with illuminated switches, smart switches and sensors without a neutral (manufacturers often offer bypass modules made for them) and with induced voltage. With dimmers whose minimum load a few LEDs cannot reach, only a module approved by that dimmer’s manufacturer is an option – a random capacitor can make the dimmer work worse.
It does not solve a switch in the neutral conductor – it may hide the glow, but the lampholder stays live. A bypass is part of the 230 V installation, rated for continuous mains operation: an electrician chooses and fits it to the manufacturer’s instructions.
Does flickering LED light harm your eyes?
There is no evidence that LEDs harm healthy people in normal use – that was the finding of the European Commission’s scientific committee SCHEER in its 2018 opinion. Among the issues needing further attention, though, it flagged light modulation, i.e. flicker.
Sensitive people may feel discomfort, eye strain or headaches under strongly flickering light. So there is no need to avoid LEDs, only flickering ones. Where you spend hours – desk, child’s room, kitchen – choose bulbs that declare low flicker and do not dim them right down on a mismatched dimmer. If symptoms persist after changing the lighting, see a doctor.
What you can check yourself and what is a job for an electrician
You can safely do yourself:
- the bulb-swap test and tightening a bulb – with the circuit breaker off or the lamp unplugged, and the bulb cooled down,
- the phone test and the pencil test,
- reading the markings on the bulb’s box, on the product page and in the dimmer’s instructions,
- adding up the LED wattage on a circuit and the strip’s wattage against the power supply,
- replacing bulbs with dimmable or better-quality ones, and replacing a strip power supply if it is a plug-in unit in a closed housing that connects to a socket.
Leave to an electrician the replacement of a dimmer, switch, motion sensor, lampholder or transformer; connecting power supplies to the 230 V installation; fitting a load capacitor or bypass module; checking whether the switch breaks the live conductor; terminals in junction boxes and switches; diagnosing voltage fluctuations and the neutral conductor.
For the electrician or a warranty claim, note the models of the bulbs, dimmer, power supply or transformer and the number of bulbs on the circuit. Add when the problem started, whether it followed a change and at which dimmer setting it appears. Note also whether it shows straight away or once warm, which rooms it affects and whether it coincides with large appliances.
Frequently asked questions
Is an LED glowing after switch-off dangerous?
The glow uses negligible energy, though constant flashing may shorten the driver’s life. The cause can be dangerous, however – a switch in the neutral conductor leaves the lampholder live, so change bulbs there only with the breaker off.
Can I use an ordinary LED bulb on a dimmer if I never dim it?
No. A phase-cut dimmer chops part of the sine wave even at full, so a non-dimmable bulb will flicker and fail sooner. If you do not plan to dim, ask an electrician to replace the dimmer with an ordinary switch.
Which dimmer should I choose for LEDs?
For 230 V LED bulbs, choose an LED-rated dimmer with a separately stated power range for LEDs and a minimum load below the bulbs’ combined wattage, ideally from the manufacturer’s compatibility list. For 12/24 V strips you need a PWM dimmer or controller fitted between the power supply and the strip.
Can a smart bulb be used with a dimmer?
Usually not. A smart bulb (Wi-Fi, Zigbee, Bluetooth) dims itself from an app or remote and needs full mains voltage – a phase-cut dimmer causes flicker and failure unless its maker explicitly allows it. For app control the switch must stay on.
A new LED bulb flickers as soon as I screw it in – should I return it?
Do the swap test first. If it also flickers in another working lamp without a dimmer, it is most likely faulty, so return it under warranty. If it works there, the cause is more likely the lamp or wiring, and a new bulb alone probably will not help.
Why are there bands on a photo when my eyes see nothing?
A phone sensor reads the image line by line, so brightness changes the eye cannot see become bands. They show the light is modulated but not by how much – faint bands with a good bulb are no concern. The actual figure comes from a flicker meter, not a phone.
Where to start
Start with the swap test. If the problem follows the bulb, buy one low-flicker model for the whole circuit, and a dimmable one for a dimmed circuit. If the only trouble is LED lights flickering when dimmed, stop buying bulbs and replace the dimmer with an LED model from the compatibility list. If 12 V bulbs that replaced halogens flicker, replace the transformer with an LED power supply. If a strip flickers and its load is close to the supply’s rating, choose a stronger supply. If a new bulb from the compatibility list still flickers, or a lamp on an ordinary switch glows when off, stop buying more and call an electrician. They need to check the connections, the dimmer and whether the switch breaks the live conductor.
Maciej Hudaszek


Maybe you will be interested in products from these categories?
Light Bulbs, Dimmer switches, LED power supplies, LED drivers
Tags & Blog Categories